


Get rid of crumpled spreadsheets and late-night calculations – it’s time for invoicing software to save the day! This guide is your go-to playbook for setting up this financial powerhouse, turning your billing process from a hassle into a smooth operation.
Imagine creating professional invoices in minutes, effortlessly tracking payments, and getting timely deposits without the stress. Wave goodbye to manual data entry and welcome automated reminders, acting like a friendly accountant-turned-elf. Whether you’re a solo entrepreneur or part of a growing team, this guide gives you the knowledge to choose the right software, customize it to your needs, and make the most of its capabilities.
To Set Up Invoicing Software
- Choose the Right Invoicing Software
- Create a User Account
- Set Up Company Information
- Configure Payment Terms
- Customize Invoice Templates
- Add Products or Services
- Set Up Tax Settings
- Link Bank Accounts
Motivated? Let’s get granular!
>>> MORE: How to Find Free Invoicing Software
1. Choose the Right Invoicing Software
To set up your invoicing software, the first step is to choose the right software for your business. So, how do you go about doing that? Firstly, do your research. Look into different invoicing software options available in the market. Check out their features, pricing plans, and user reviews. This will give you a good idea of what each software has to offer and help you make an informed decision.
Next, compare. Take the time to compare the different software options based on your specific business needs. Consider factors like ease of use, customization options, integration with other tools, and customer support.
Remember, the right software for your business might not be the same as someone else’s. So, think about what features are essential for your invoicing process.
Once you’ve done your research and compared your options, make a decision and sign up for an account with the chosen software provider. Now, you’re well on your way to setting up your invoicing software!
2. Create a User Account
To select the perfect invoicing software for your business, it’s time to create a user account. Head over to the software provider’s website. Look for the “Sign Up” or “Create Account” button. Click on it, and you’ll be taken to the account creation page.
Fill in the required information. Typically, you’ll need to provide your name, email address, and sometimes a password. Make sure to choose a strong password to keep your account secure.
Now, add your business name, logo, and contact info to make it yours. Explore the settings to match your invoicing style – set your currency, payment terms, and preferences.
Here’s the fun part – try it out. Make a pretend invoice, send it to yourself, and see how it looks. This account is your invoicing space – use it wisely. Making a user account isn’t just a step; it’s your door to smoother, stress-free invoicing. Enjoy!
>>> PRO TIPS: How to Choose Asset Management Software
3. Set Up Company Information
To configure Invoicing software, set up company information. Start by locating the “Company Information” or similar section in your software settings. Here, you’ll input vital details like your business name, address, and contact information. This not only makes your invoices look professional but also ensures clients can easily reach you.
Don’t forget to add your logo if your software allows it – it adds a visual touch that reinforces your brand identity. Some software might also let you include a tagline or a short description, so use this space wisely to showcase what makes your business special.
Once you’ve filled in these details, double-check everything for accuracy. This ensures your invoices convey the right information and create a positive impression.
4. Configure Payment Terms
To establish Invoicing software, configure payment terms. Payment terms are the conditions that you and your customers agree on for paying invoices. They specify when and how much you expect to receive for your products or services. Configuring payment terms in invoicing software can help you manage your cash flow, avoid late payments, and communicate clearly with your customers.
Choose an invoicing software that suits your business needs and budget. Then,
Create a list of payment terms that you want to offer to your customers. You can use standard terms like net 30, which means the payment is due 30 days after the invoice date, or create custom terms that suit your business model.
Set up your payment terms in your invoicing software. You can do this by creating a new term record, selecting the type of term, and entering the details. Send your invoices to your customers and track their payments. You can use your invoicing software to send invoices by email, print them, or share them online. You can also set up automated reminders, apply late fees, and accept online payments.
5. Customize Invoice Templates
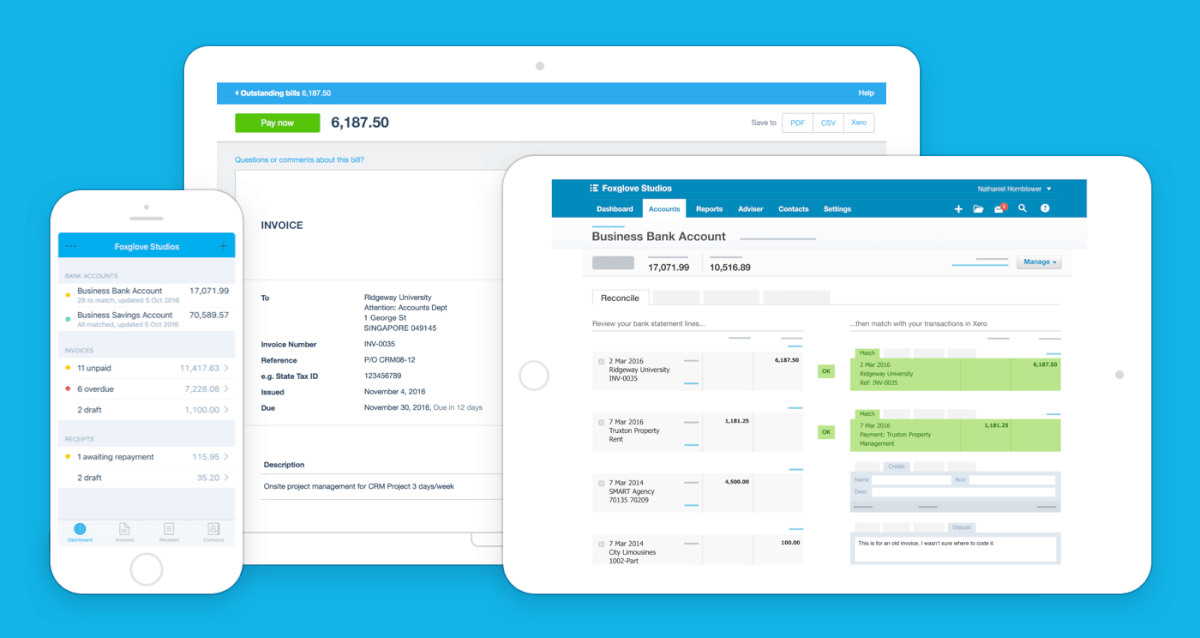
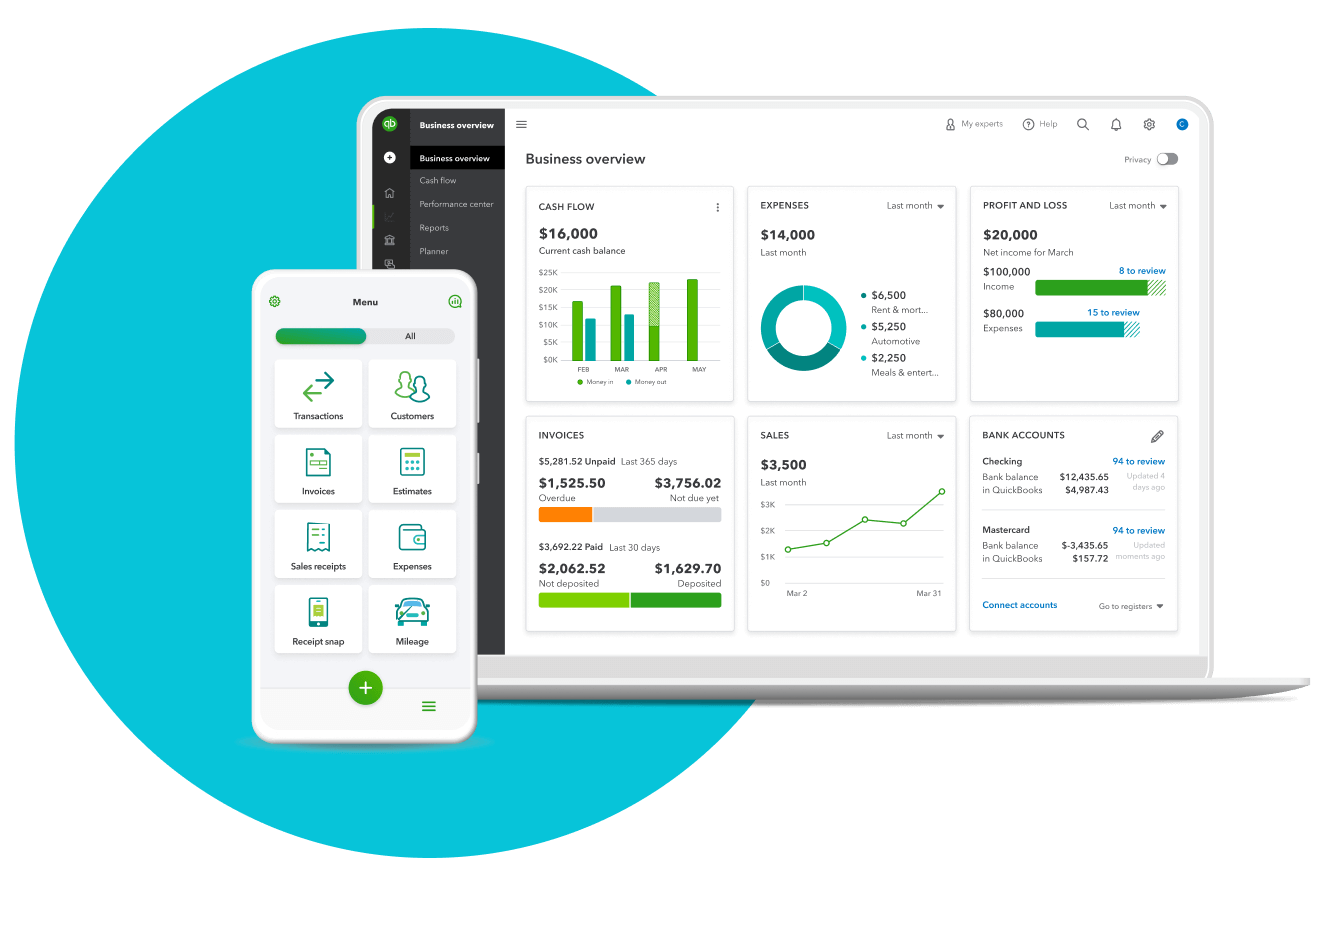
To initiate the setup of invoicing software, begin by customizing your invoice templates. Choose invoicing software that enables you to tailor your invoice templates to suit your requirements. Some popular options are QuickBooks, NetSuite, SoftwareSuggest, Square, and Canva. Select a template that matches your business type and industry. You can use the default templates the software provides or browse through the online library of templates. Edit the template according to your liking. You can change the color scheme, font style, logo, header, footer, and other elements. You can also add or remove fields, such as discounts, taxes, shipping, and notes. Save your customized template and use it for your invoices. You can also create multiple templates for different types of customers or services.
6. Add Products or Services
To configure invoicing software, one crucial step is to add your products or services. First, create customized invoices that align with your brand. Many modern invoicing software options offer premade templates that you can personalize to match your desired look and feel.
Next, include a clear description for each line item on the invoice. This description should accurately represent the product or service provided. Providing detailed descriptions helps your customers understand what they are being charged for.
Specify the amounts charged for each line item. This ensures transparency and allows your customers to see the breakdown of costs.
Calculate the total amount due for the invoice. This should be the sum of all the line items, along with any applicable taxes or discounts.
7. Set Up Tax Settings
To set up tax settings in your invoicing software, follow these straightforward steps. Begin by locating the “Settings” or “Preferences” section. Look for a category related to taxes or financial settings.
Once there, you’ll see options to input your tax rates. Enter all relevant rates based on your location and business needs. Some software allows you to set different tax rates for various products or services.
Specify whether your prices include or exclude taxes for clarity. This is essential for accurate invoicing and transparency with your clients.
Before saving, double-check your settings to ensure they align with local tax regulations. This step-by-step process ensures your invoicing software accurately calculates taxes, saving you time and avoiding potential errors.
8. Link Bank Accounts
To establish invoicing software, start by connecting your bank accounts for seamless transactions. Navigate to the “Settings” or “Account” section – it’s usually at the top or in the sidebar. Look for an option like “Connect Bank” or “Add Account.” Click on it.
Next, follow the prompts to enter your bank details securely. Ensure you have your account number and routing number handy. Some software might use a secure third-party service for this step.
Once linked, your software will automatically reconcile transactions, saving you time on manual entries. This not only streamlines your invoicing process but also ensures accurate financial records. Keep an eye on any notifications or prompts during the linking process to confirm successful integration. Now, you’re all set to send invoices and track payments effortlessly!
>>> GET SMARTER: How to Choose Accounting Software
Recap
To set up the ideal invoicing software that suits your needs, first establish a user account for seamless access. Input crucial company details to personalize your invoices. Define payment terms to ensure smooth transactions. Customize invoice templates for a professional touch. Include your products or services for accurate billing.
Set up tax settings to meet regulatory requirements. Link your bank accounts for efficient financial tracking. Follow these steps for a hassle-free invoicing software setup. Your business transactions just got a whole lot smoother.